Netgear EX5000 Setup
The Netgear AC1200 EX5000 is a dual-band WiFi range extender that extends the radius of your existing network to the dead spots of your home or office and provides WiFi rates of up to 1200 Mbps. All you have to do now is finish the Netgear EX5000 setup and you’ll be connected across your home. It’s suitable with any existing WiFi network and is ideal for online gaming and streaming HD video. You can learn how to set up the Netgear AC1200 EX5000 WiFi range extender without any problems here. Let’s get this process started.
How to setup my Netgear EX5000 Extender??
Netgear EX5000 extender setup manual guide steps as follow:
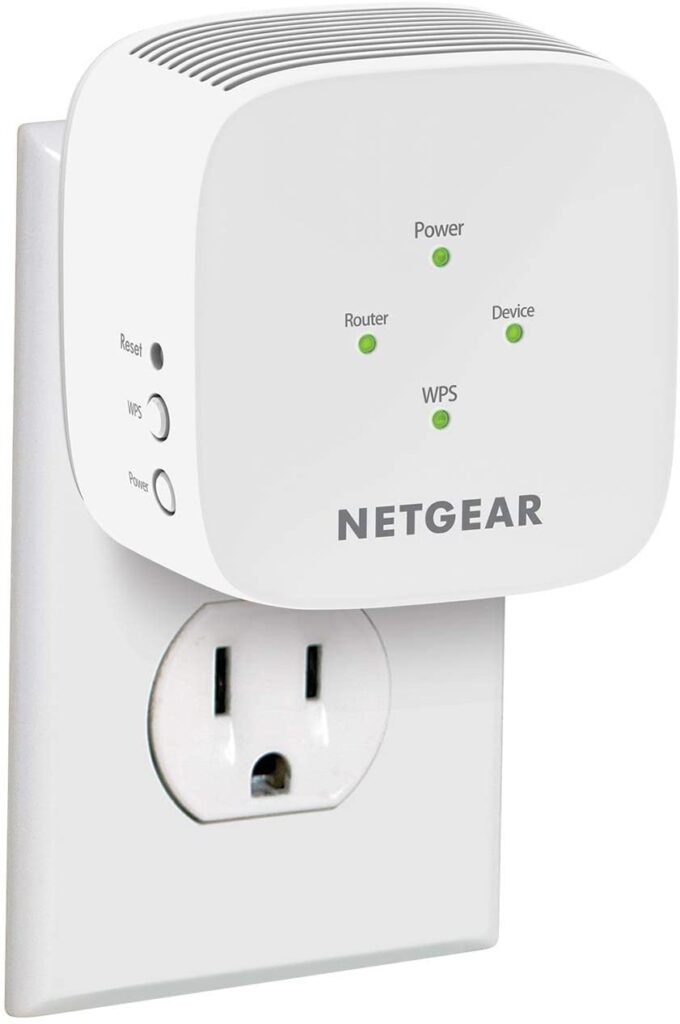
- To set up, first connect your Netgear EX5000 to an electrical outlet.
- Wait for the power light to turn solid green on the AC1200 WiFi booster.
- Find a laptop or tablet and connect your device to the “Netgear_Ext” default network.
- Once your device is connected, open a web browser and type www.mywifiextinfo.net in the address bar.
- You are now on the Netgear EX5000 setup AC1200 page.
- Click on the “New Extender Setup” button and create a login account.
Now follow the onscreen instructions to install your wireless booster in your home or office. If you face any trouble installing your WIFI repeater, feel to talk to our chat support team to help you to install the extender.
Netgear EX5000 Setup | AC1200
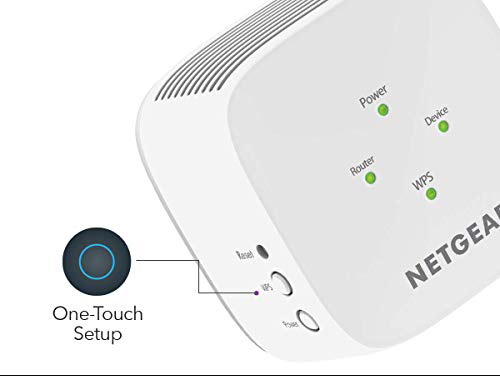
by WPS method. WPS method is another way to perform Netgear extender setup and it is also considered as the most easy and quick process to install your wifi booster. In this process you have no need to put your passphrase, username or any other details. You will have to tap on a small button on your extender as well as on the router also. Let’s see how.
To setup Netgear EX5000 by WPS Method go through these steps:
To setup Netgear EX7700 Nighthawk X6, follow the steps given below:
- Plug in and turn on your Netgear EX5000 extender.
- For initial setup, your AC1200 extender should be placed close to the router.
- You will now see the power LED on your EX5000 turning green.
- Once the light is green, press the WPS button on the extender.
- After that, press the WPS button on your existing Wi-Fi router.
- Within two minutes, the client link LED will turn solid green.
- If your router supports the 5GHz band, press the WPS button again on both your extender and router.
Netgear EX5000 Firmware Update
Are you facing any trouble with your extender? Is it not giving the proper required speed or is it behaving badly? If yes then in order to resolve this issue you will have to perform Netgear EX5000 firmware update on your wifi range booster. By updating the latest version of firmware on your extender, you will get the latest security features and all other features which are helpful to get rid of these problems.
For Netgear EX5000 firmware update follow the given steps below:
- Turn on your Netgear EX5000.
- Make sure your extender is connected to the existing router.
- Open any internet browser like Google Chrome, Mozilla Firefox, or Internet Explorer.
- Type www.mywifiextinfo.net in the address bar and press Enter.
- Enter your extender’s model number, username, and password.
- Open the settings and select the firmware version.
- Click on Download.
- Wait a couple of minutes until the firmware update process is completed.
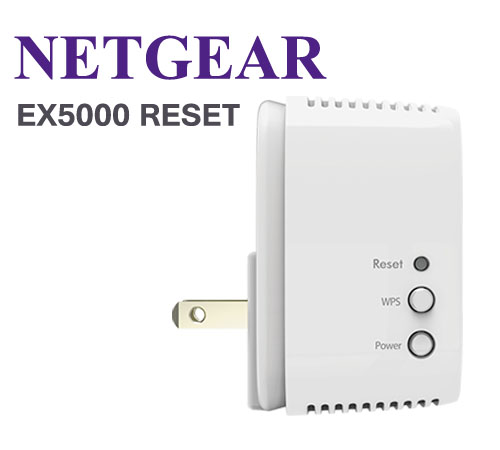
How to reset Netgear EX5000?
If you forget your admin password and want to recover it then you will have to reset Netgear EX5000. By doing so it will make your extender ready for the initial setup process by deleting all the personalized details including your password,username and SSID e.t.c. In order to reset Netgear EX5000 you must have a toothpick or a paperclip with you.
To reset Netgear EX5000 follow the steps below:
- Turn on your Netgear EX5000.
- Locate the reset pinhole on the extender.
- Take a sharp pointed object like a toothpick.
- Insert the toothpick (or any pointed object) into the reset hole.
- Keep the pin pressed until the power light on the extender flashes amber.
- Remove the toothpick and wait for the power LED to turn solid green.
- Your AC1200 is now ready for the initial setup process.
- Do not unplug your booster while attempting to reset it.